Imagine harvesting a fresh, crunchy, and flavorful burst of nutrients right from your kitchen countertop. Microgreens—tiny, young vegetables and herbs—pack a powerful nutritional punch, offering up to 40 times the vitamins of their mature counterparts. They grow quickly, require minimal space, and are surprisingly easy to cultivate indoors. Whether you’re a health enthusiast or a busy urban dweller, microgreens can be a game-changer for your diet and well-being. This guide will take you through everything you need to know about growing microgreens at home, from selecting seeds to harvesting your first crop, with practical tips and expert insights.
What Are Microgreens?
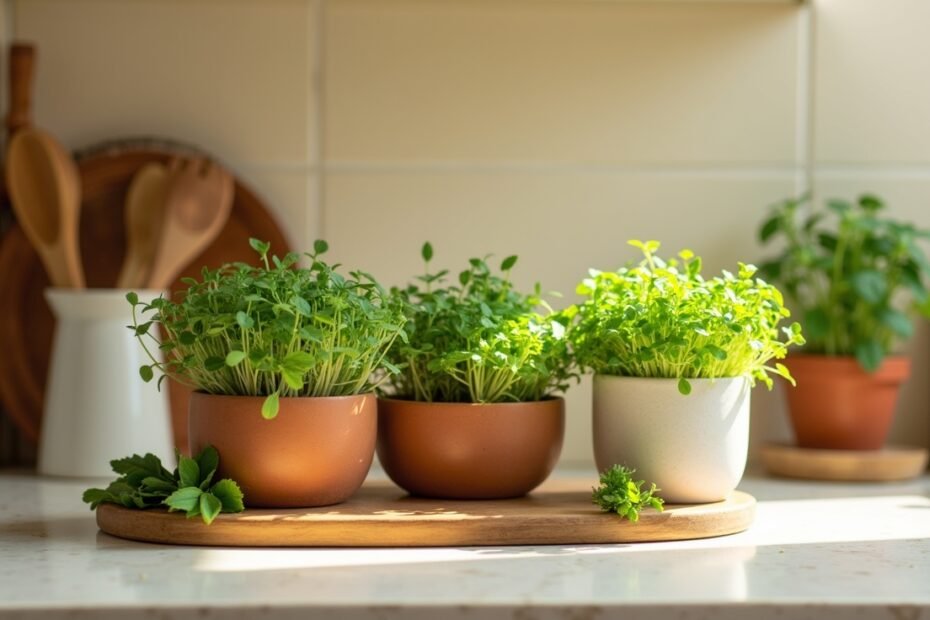
Microgreens are young, edible seedlings harvested just after the first true leaves appear. They come in a variety of flavors and colors, including basil, radish, broccoli, sunflower, and pea shoots. Despite their small size, these miniature greens are incredibly dense in vitamins, minerals, and antioxidants.
Key Characteristics
- Fast Growth Cycle:
Most microgreens are ready to harvest in 7 to 21 days, making them one of the fastest-growing crops. - High Nutritional Content:
Studies have shown that microgreens can contain up to 40 times more vitamins and antioxidants than their mature versions. They are rich in vitamins C, E, and K, as well as beta-carotene and polyphenols. - Versatility:
Microgreens can be used in salads, sandwiches, smoothies, and as garnishes to add a burst of flavor and nutrition.
Benefits of Growing Microgreens Indoors
Growing microgreens at home offers several benefits that extend beyond their impressive nutritional profile:
1. Nutritional Powerhouse
Due to their concentrated nutrients, microgreens provide a quick and effective way to supplement your diet with essential vitamins and antioxidants. They can help boost your immune system, support eye health, and even reduce inflammation.
2. Quick Harvest
Because microgreens have a very short growth cycle, you can enjoy fresh produce within a couple of weeks. This rapid turnaround makes them ideal for those looking to see results quickly and for gardeners with limited patience.
3. Space Efficiency
Microgreens require minimal space—perfect for urban living where gardens are often limited to balconies, windowsills, or small countertops. With just a shallow tray and some seed, you can start a mini garden indoors.
4. Cost-Effective
Starting a microgreens garden is inexpensive. With a small investment in trays, quality seeds, and a basic growing medium (like organic potting soil or coconut coir), you can produce a continuous supply of nutritious greens.
5. Sustainable and Eco-Friendly
Growing your own microgreens reduces the need for store-bought produce, which often involves long transportation routes and higher carbon footprints. By cultivating them at home, you contribute to a more sustainable food system.
Setting Up Your Indoor Microgreens Garden
Creating a successful microgreens garden indoors is straightforward. Follow these step-by-step instructions to get started.
Step 1: Gather Your Materials
Before you begin, make sure you have the following items:
- Seeds: Choose from a variety of microgreen seeds such as radish, broccoli, sunflower, pea, or basil.
- Trays: Shallow, food-grade plastic or biodegradable trays with drainage holes.
- Growing Medium: Organic potting soil, coconut coir, or a specialized microgreens mix.
- Watering Can or Spray Bottle: For gentle, even watering.
- Light Source: A sunny windowsill or, if natural light is limited, LED grow lights designed for indoor gardening.
- Optional: A humidity dome or clear plastic cover to retain moisture during the initial germination phase.
Step 2: Preparing the Trays
- Fill the Tray:
Add 1–2 inches of your chosen growing medium to the tray. Ensure the soil is level but not compacted, as good drainage is essential. - Moisten the Soil:
Lightly water the soil until it is evenly moist but not soggy. Overwatering can lead to mold and poor seed germination.
Step 3: Sowing the Seeds
- Even Distribution:
Sprinkle your microgreen seeds evenly over the surface. Avoid clustering the seeds too densely, but ensure they are close enough to maximize yield. - Light Pressing:
Gently press the seeds into the soil with your fingers to ensure good contact, which aids in germination. - Covering (Optional):
If using a humidity dome or plastic cover, place it over the tray to create a mini greenhouse effect. This step helps maintain moisture, especially in dry environments.
Step 4: Germination and Growth
- Light Exposure:
Place the tray in a location that receives indirect sunlight. If using artificial light, set up your LED grow light 12-18 inches above the tray. Microgreens typically need 12-16 hours of light per day. - Maintain Moisture:
Keep the soil consistently moist by misting it once or twice a day. Avoid overwatering to prevent mold formation. - Germination Period:
Seeds usually germinate within 2-5 days. Once they sprout, remove the cover (if used) to improve air circulation.
Step 5: Harvesting Your Microgreens
- Ideal Harvest Time:
Microgreens are typically ready to harvest when the first true leaves have developed, usually between 7 and 21 days after sowing. The timing may vary depending on the type of seed. - Harvesting Technique:
Use clean scissors to snip the microgreens just above the soil line. Harvesting gently ensures you don’t disturb the remaining plants, allowing for staggered harvests. - Post-Harvest Care:
Rinse the microgreens in cool water and pat them dry with a paper towel. Enjoy them fresh, or store them in a sealed container in the refrigerator for up to a week.
Nutritional Value of Microgreens
Microgreens are renowned for their high nutritional density. Here’s a quick look at their benefits:
Table: Nutritional Benefits of Common Microgreens
| Microgreen | Key Nutrients | Notable Benefits |
|---|---|---|
| Broccoli | Vitamins A, C, K, Folate, Antioxidants | Boosts immune function and promotes healthy skin |
| Radish | Vitamin C, Beta-Carotene, Calcium | Supports eye health and aids in digestion |
| Sunflower | Vitamin E, B Vitamins, Selenium | Enhances skin health and offers antioxidant protection |
| Pea | Protein, Fiber, Vitamins C and K | Supports muscle repair and overall vitality |
| Basil | Vitamin K, Iron, Magnesium | Improves bone health and aids in stress reduction |
These tiny greens are not only a delicious addition to your meals, but they also pack a nutritional punch that can support overall wellness.
Creative Ways to Use Microgreens
Once you’ve mastered growing microgreens, there are countless ways to incorporate them into your daily routine:
Culinary Applications
- Salads and Sandwiches:
Add a handful of microgreens to salads or as a topping on sandwiches for extra flavor and crunch. - Smoothies:
Blend microgreens into your morning smoothie for an instant nutrient boost. - Garnishes:
Use microgreens to garnish soups, pizzas, and even desserts, adding a pop of color and freshness. - Herbal Teas:
Experiment by steeping microgreens in hot water to create unique, nutrient-rich teas.
Decorative Uses
- Edible Arrangements:
Create visually stunning edible bouquets or terrariums that combine microgreens with other edible flowers. - Table Centerpieces:
Incorporate microgreens into your table décor for a modern, natural aesthetic. - DIY Projects:
Use microgreens in art projects or as part of living walls to bring a touch of nature into your home or office.
Troubleshooting Common Issues
Even with a simple setup, you might encounter some challenges. Here are common issues and how to address them:
1. Poor Germination
- Cause: Low seed quality, improper soil moisture, or insufficient contact between seeds and soil.
- Solution: Use high-quality seeds, ensure the soil is evenly moist, and lightly press seeds into the soil for better contact.
2. Mold and Fungal Growth
- Cause: Excess moisture, poor air circulation, or overly dense seeding.
- Solution: Remove the cover once seeds germinate, reduce watering frequency, and ensure adequate spacing between seeds.
3. Leggy or Spindly Plants
- Cause: Insufficient light exposure.
- Solution: Ensure microgreens receive at least 12-16 hours of light daily. If using artificial light, adjust the distance between the light and the tray.
4. Overcrowding
- Cause: Seeds sown too densely.
- Solution: Thin the seedlings gently once they start growing to allow each plant enough space for optimal growth.
Expert Insight
According to horticulturist Dr. Samantha Reed,
“Microgreens are an excellent way to get a concentrated dose of nutrients with minimal space and time. They’re perfect for urban dwellers and anyone looking to add a fresh twist to their meals. With the right techniques, anyone can grow microgreens successfully at home.”
Dr. Reed’s advice is backed by research published in the Journal of Agricultural and Food Chemistry, which highlights the remarkable nutritional benefits and rapid growth of microgreens.
Future Trends in Microgreen Cultivation
The popularity of microgreens is only expected to grow as more people discover their nutritional and culinary benefits. Emerging trends include:
- Automation and Smart Gardening:
Integrating smart sensors and automated watering systems to monitor and optimize growth conditions. - Vertical and Hydroponic Systems:
Expanding indoor microgreen production through innovative setups that maximize space and efficiency. - Sustainable Packaging and Local Markets:
As consumer demand increases, local farms and urban gardeners are exploring eco-friendly packaging and direct-to-consumer sales models.
Frequently Asked Questions (FAQ)
- What are microgreens?
Microgreens are young seedlings harvested just after the first true leaves appear. They are nutrient-dense and can be grown quickly in small spaces. - How long do microgreens take to grow?
Most microgreens are ready to harvest in 7 to 21 days, depending on the variety and growing conditions. - Can I grow microgreens indoors without natural light?
Yes, with the use of LED grow lights, you can successfully cultivate microgreens indoors regardless of the natural light available. - What’s the best growing medium for microgreens?
A well-draining organic potting mix or coconut coir works well. Ensure the medium retains moisture without becoming waterlogged. - How do I prevent mold in my microgreen setup?
Ensure proper air circulation, avoid overwatering, and remove the humidity cover once seedlings appear to prevent mold formation.
Conclusion
Growing microgreens at home is an accessible and rewarding way to boost your nutrition and add a touch of freshness to your meals. With a simple setup, minimal space requirements, and a short growth cycle, microgreens offer a powerful combination of convenience and health benefits. Whether you’re new to gardening or looking to expand your urban farming skills, the world of microgreens invites you to experiment and enjoy the fruits—well, greens—of your labor.
By following this guide and implementing the practical tips provided, you can create a thriving microgreens garden right in your home. Embrace the journey of growing these nutrient-rich superfoods and discover how a few small seeds can transform your diet and your lifestyle.
Read also: 7 Medicinal Teas You Can Grow at Home